
Team Timeline Building | Coordinate your year in 12 Steps
Yesterday, I supported a group creating a complex timeline.
That was SOMETHING. I felt less like a facilitator, and more like a throttler.
Great group, great rapport among each other, clear objective to tackle in an appropriate amount of time.
So, what's the problem, Agerbeck?
Now on the other side of the project, I could see the team could have had a far more swift and collaborative experience by getting their hands onto their own process.
What happened
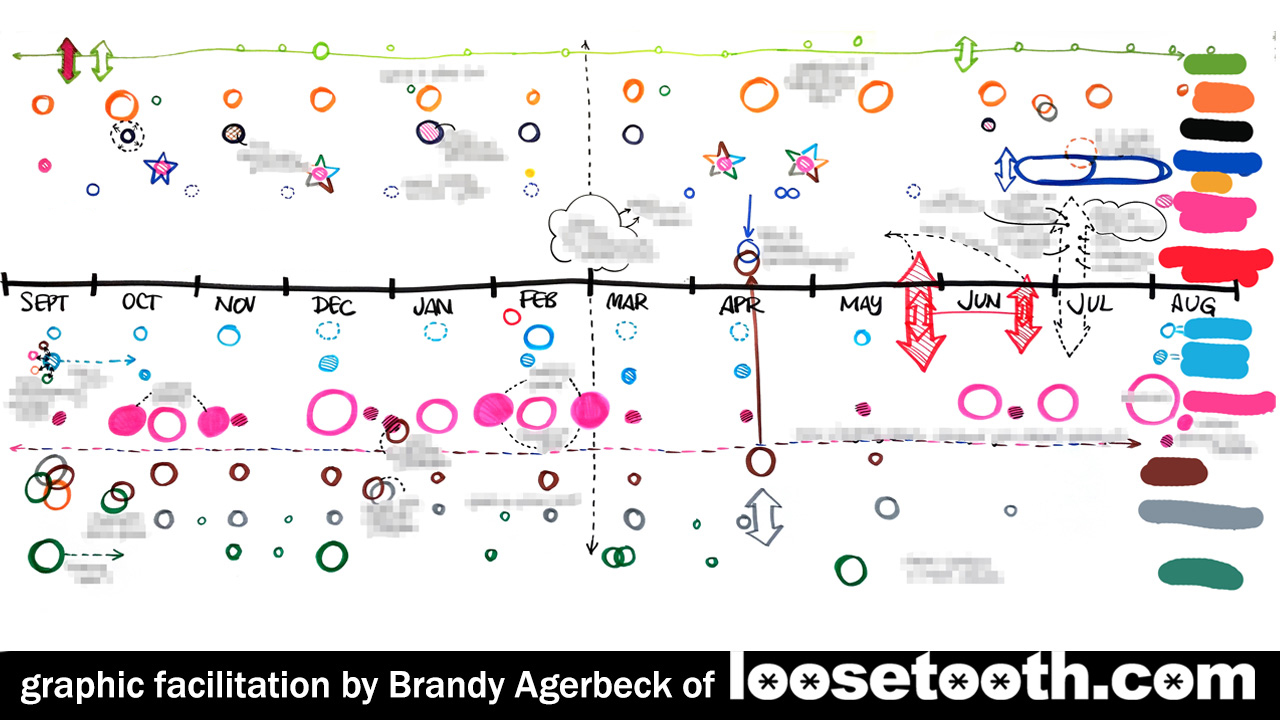
A dozen people were mapping 15 categories across the year. Each category had different sizes of items.
Each item on the timeline would need to be clearly understood by:
- Category
- Timing
- Size
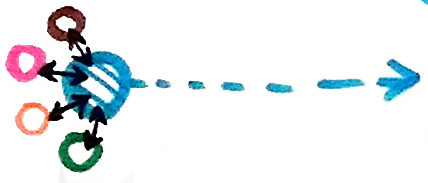
Timing was easy. Horizontal timing lined up with monthly labels on a timeline across my giant paper.
👇Size was specified by a key in the lower left corner:

Categories by colors along the right side. ☝️
All makes sense. All straightforward.
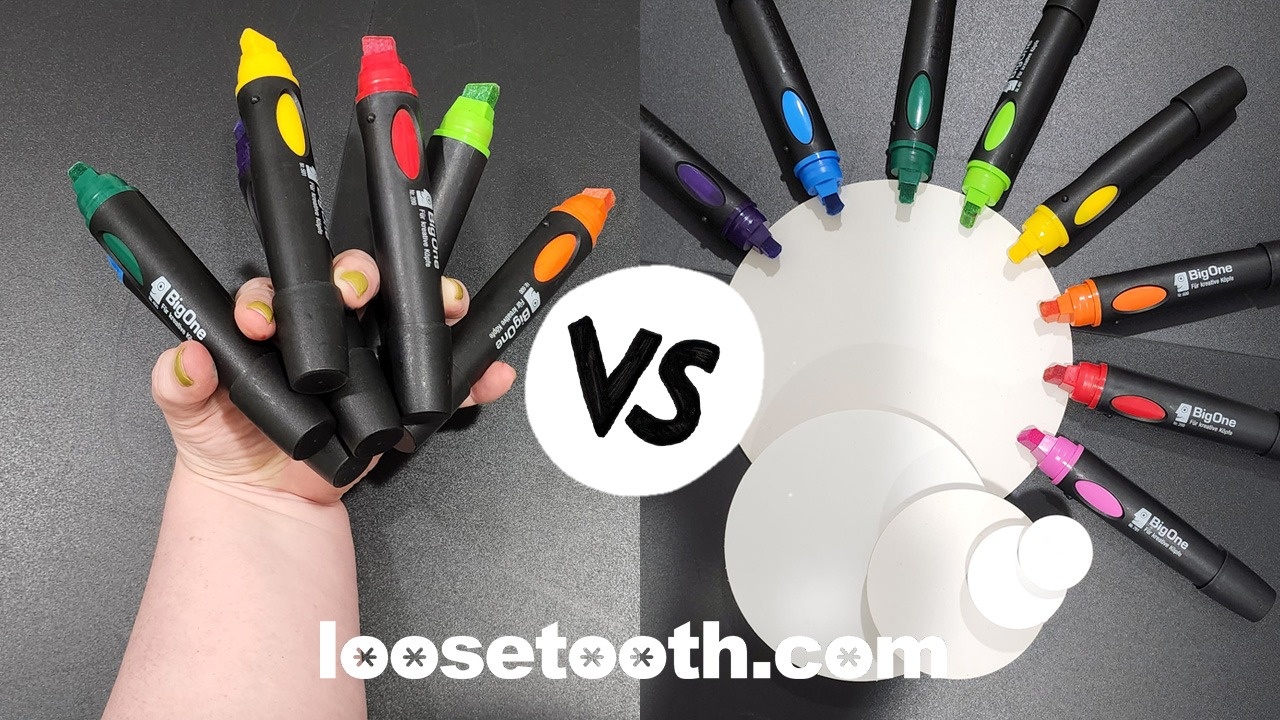
The issue is that I'm the only person in the room with the markers.
We were making decisions in ink.
By committee.
This meant I was perched by the timeline waiting for the next item decided and ready to ink in. Asking lots of clarifying questions to make sure each circle was the right size, color and placement.
Not so flexible. Long, linear conversation.
We got the job done.
What I would have designed to improve the process
What follows is 12 steps that would have met the objective, while also:
- Getting the team on their feet and moving around after lunch
- Allowed for parallel processing to get iterations up on the wall faster.
- Making changes more easily with movable pieces
- Giving the tools to the team, given them more of a sense of agency, accomplishment and commitment.

Materials needed:
⬜ Loads and loads of circles of various sizes
Sticky notes or cut paper and low-tack tape.
The three larger circles here are Neuland Stick-It cards.
The 2 smaller ones are made with a paper punches.
⬜ Markers of various colors
If any content is already color coded, have those colors on hand.
Black markers for text that will write legible lettering at all scales
⬜ Giant roll of paper to attach circles to
This give you space to make notes, arrows, connections between items.
⬜ Low tack tape (masking tape, painters tape, or artists tape)
1 | Draw out your timeline horizontally across your paper
I use 48" inch wide poster bond paper from Blick Art Materials. This can be butcher, kraft, or bulletin board paper. Alternatively, you can line up sheets of flipchart paper.
If you are super concerned that your line is straight, you can:
- run the dates across the top
- fold the paper lengthwise to make a guide
- or accordion fold the paper, making each vertical section a unit of time.
2 | Hang that paper to the wall
3 | Define each category and give it a color
Outline a large circle, one per color. Line these up along other parts of the room (ideally not overlapping the long piece of paper) with flat wall space under them.
As a group, standing up, decide what colors align with what categories. Take in account any preexisting branding or color coding.
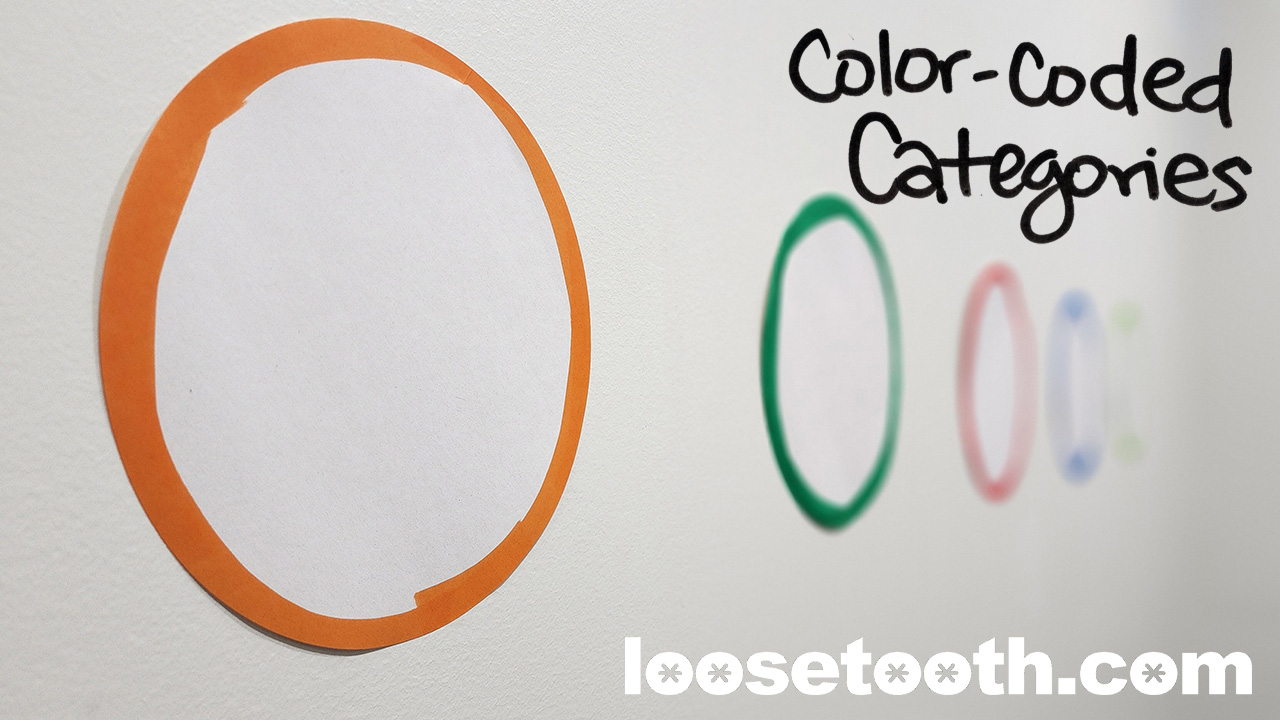
I would do this with each person walking to a specific circle making them the initial "owner" of that category. Each person writes the category name in the circle.
If there are more categories that people, make sure each category is owned by someone.
Set aside any unused colors of circles.
4 | Agree on what each size circle means as a group.
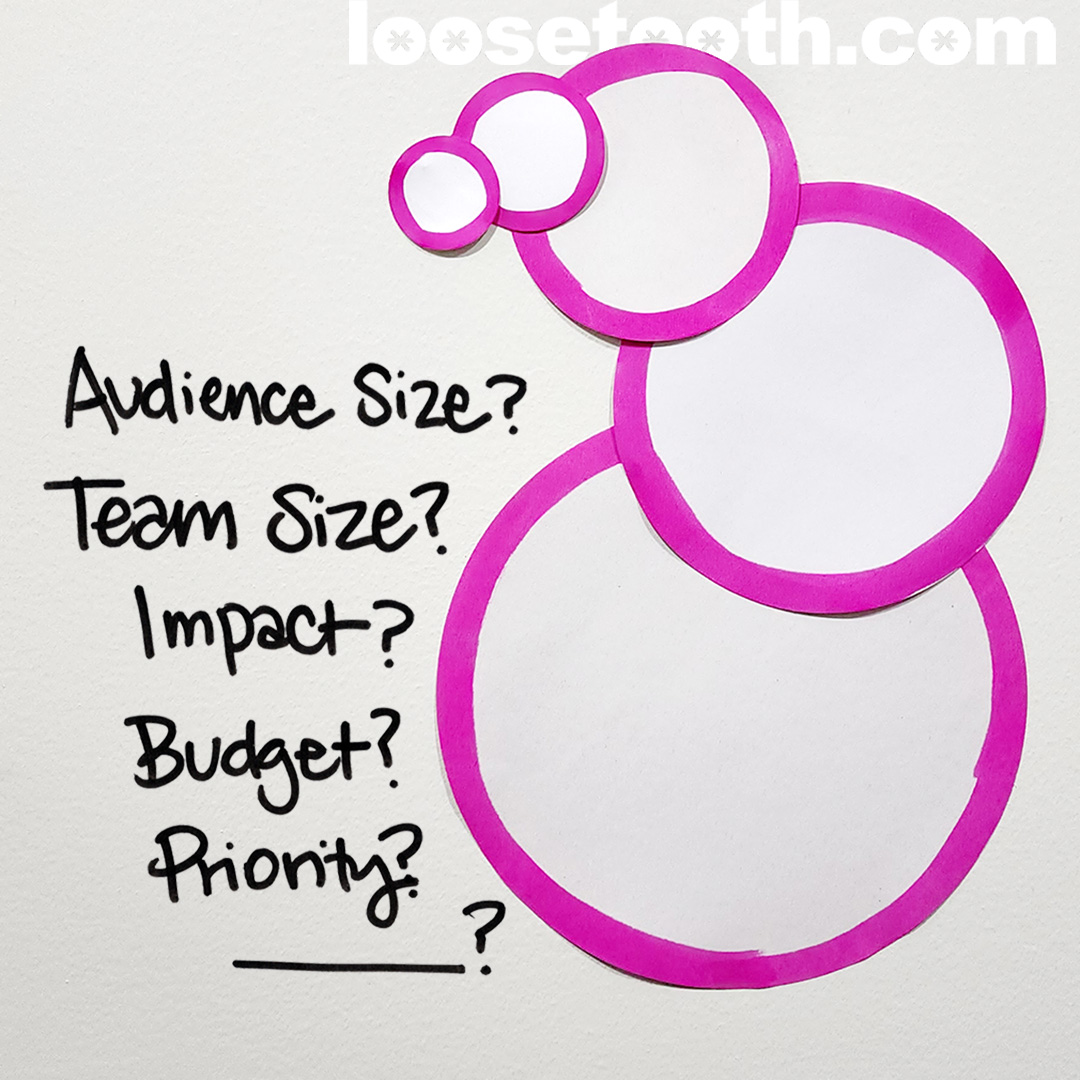
This is entirely dependent if you want to use dimension of information. This was "baked into" my client experience above.
I only use 5 here as an example.
I would say if you don't have a clear filter for this, I'd suggest using 3 sizes of circles to determine either:
Resources needed: People, Time, Money, Effort
or
Results: Organizational Priority, Impact, Income
5 | Distribute a heckload of white circles to each person, with black markers and their one colored marker
You could prep bins of supplies below each outlined circle. Or one bin of circles and black markers for each person, handing out each color marker as they are assigned.
Either way, have these materials ready. Do not slow down the momentum dividing out supplies.
Never, ever skimp on materials. Don't inhibit the group's work by running out of supplies!
You can always save the extras for other uses.
6 | Each person now writes down all the items within their category
One item per circle. Circle size determined as you go.
I recommend doing a round in silence first so folks can concentrate. Then an open round to ask each other questions.
If the date is known, it can be noted on the circle.
Mark the circles by color.
As the graphic facilitator, I'd be watching to see who has questions on the process, handing out more circles as needed, and if its not intrusive, offering to add the color coding to circles to save the participants time.
7 | Label the horizontal edge of the timeline with the categories
While the group is working on the items, prep timeline with category labels. If anything is sequential or interdependent, use those relationships to determine order.
For example, if Security and Facilities Management are two teams closely connected, make them neighbors on the timeline.
8 | Move the circles onto the timeline
Great step for a break. "Before you go into break, Move your circles onto the timeline. Be back into the room at 3:00 pm ready to discuss the whole timeline."
Assign one or two "scouts." Choose the big-picture people or lead decision makers. In my experience, these are always quick to step up, because they enjoy the type of thinking needed here. They are watching the placement of circles, looking for patterns and potential changes.
Based on group dynamics and team culture, decide if these scouts should:
- Physically start moving items around over the break and then describe those changes when the group reconvenes
OR - Make notes of potential changes, but wait until reconvening to move items as a group
Either approach works. The overarching principle is transparency in process. No one should feels like they are left out of refining the timeline.
9 | Step back and look at the timeline as a whole
It is useful to first have a silent "gallery walk" on your feet to take in how all the pieces came together on the same Landscape.
10 | Discuss changes as a group
Ideally, you have room to be standing as a group for this step facing the timeline. This will keep the energy up and moving.
Look for:
- Changes in timing
"Let's move this to May" - Changes in sequence
"We can't do X in November until after our fundraiser in October" - Changes in circle size
"Y is less important than that." - "Log jams" where too much is happening at once to be executed well
"How are we going to get through September with all that workload?" - Lulls in calendar, which might be too quiet, or may be a time to catch up or plan the next items
"January is too quiet. Will we lose our momentum?" - Conflicts between items
"We can't analyze the results in May if the survey deadline is in June."
11 | Take a second pass at the timeline
Shift to sitting down for the next part of the discussion. Do more refinements become apparent are you're seated facing each other instead of towards the timeline?
This discussion is a prime time for adding to the map in the spaces in between the circles on the paper.
In yesterday's discussion, these are some of the shapes that emerged. These are not prescriptive.
Input from several categories needed for blue to move forward
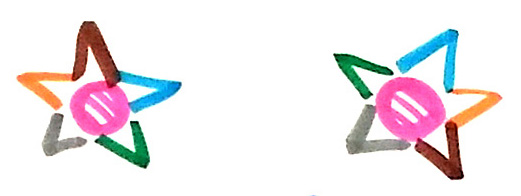
Pink leads on this item, but the other 5 colors contribute to its success.
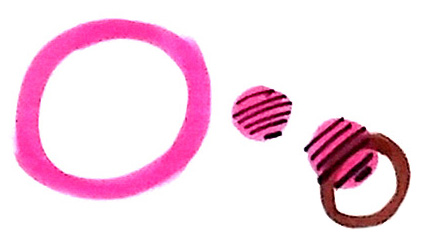
Items overlap
The pink category spawned two more categories. The resulting "pink party" had outlined circles, filled in circles and pink ones with black hatchmarks.
12 | With group agreement, photograph and distribute timeline.
This timeline may be 100% ready, or you may need to share with other stakeholders to refine the timeline further.
Likely, you'll want to recreate the timeline in a digital format. Consider keeping the colors and circle sizes in the next iteration for continuity and depth of information.
If you are seeking input and changes from others, share the photograph of the timeline, not a digitized version.
A diagram in Powerpoint, or the like, feels more set or done. A photo with handwritten items on a physical map feels more sketchy and in-process.
If you use these 12 steps to tackle your timeline, I'd love to hear how it went.
You can contact me about joining your group onsite to facilitate this process. I am also available to consult on how to prep and run this session.
Please share this page with anyone who would find it useful.

